Controlling A Seven Segment Display With Raspberry Pi And Python
In this lesson, we are going to cover how we can control a seven segment display using a Raspberry Pi and Python. If you are unfamiliar with what a Raspberry Pi or Python, please read my previous article on both found here.
Getting Started
Items Needed
For this project, I will be using the following items:
- Raspberry Pi Model B running Raspbian
- Seven Segment Display
- Bread Board
- Jumper Cables
Seven Segment Displays
It is important to note that there are two common types of Seven Segment Displays, Common anode and Common Cathode. A Common Anode display only requires one positive terminal connected to power and all other segments are connected to a negative terminal. In a Common Cathode Display, the opposite is true.
In this tutorial, I will be using a Common Anode display. Feel free to use either, but adjust the code accordingly.
Wiring
To power the display, we are going to need 8 pins on the Raspberry Pi, 1 common power and 7 others to illuminate each segment. (I am ignoring the period/dot for now).
In the diagram above, each segment of the display corresponds to an individual pin. On the bread board, connect 5 wires on the top of the display, and 3 at the bottom (for pints e, d and c).

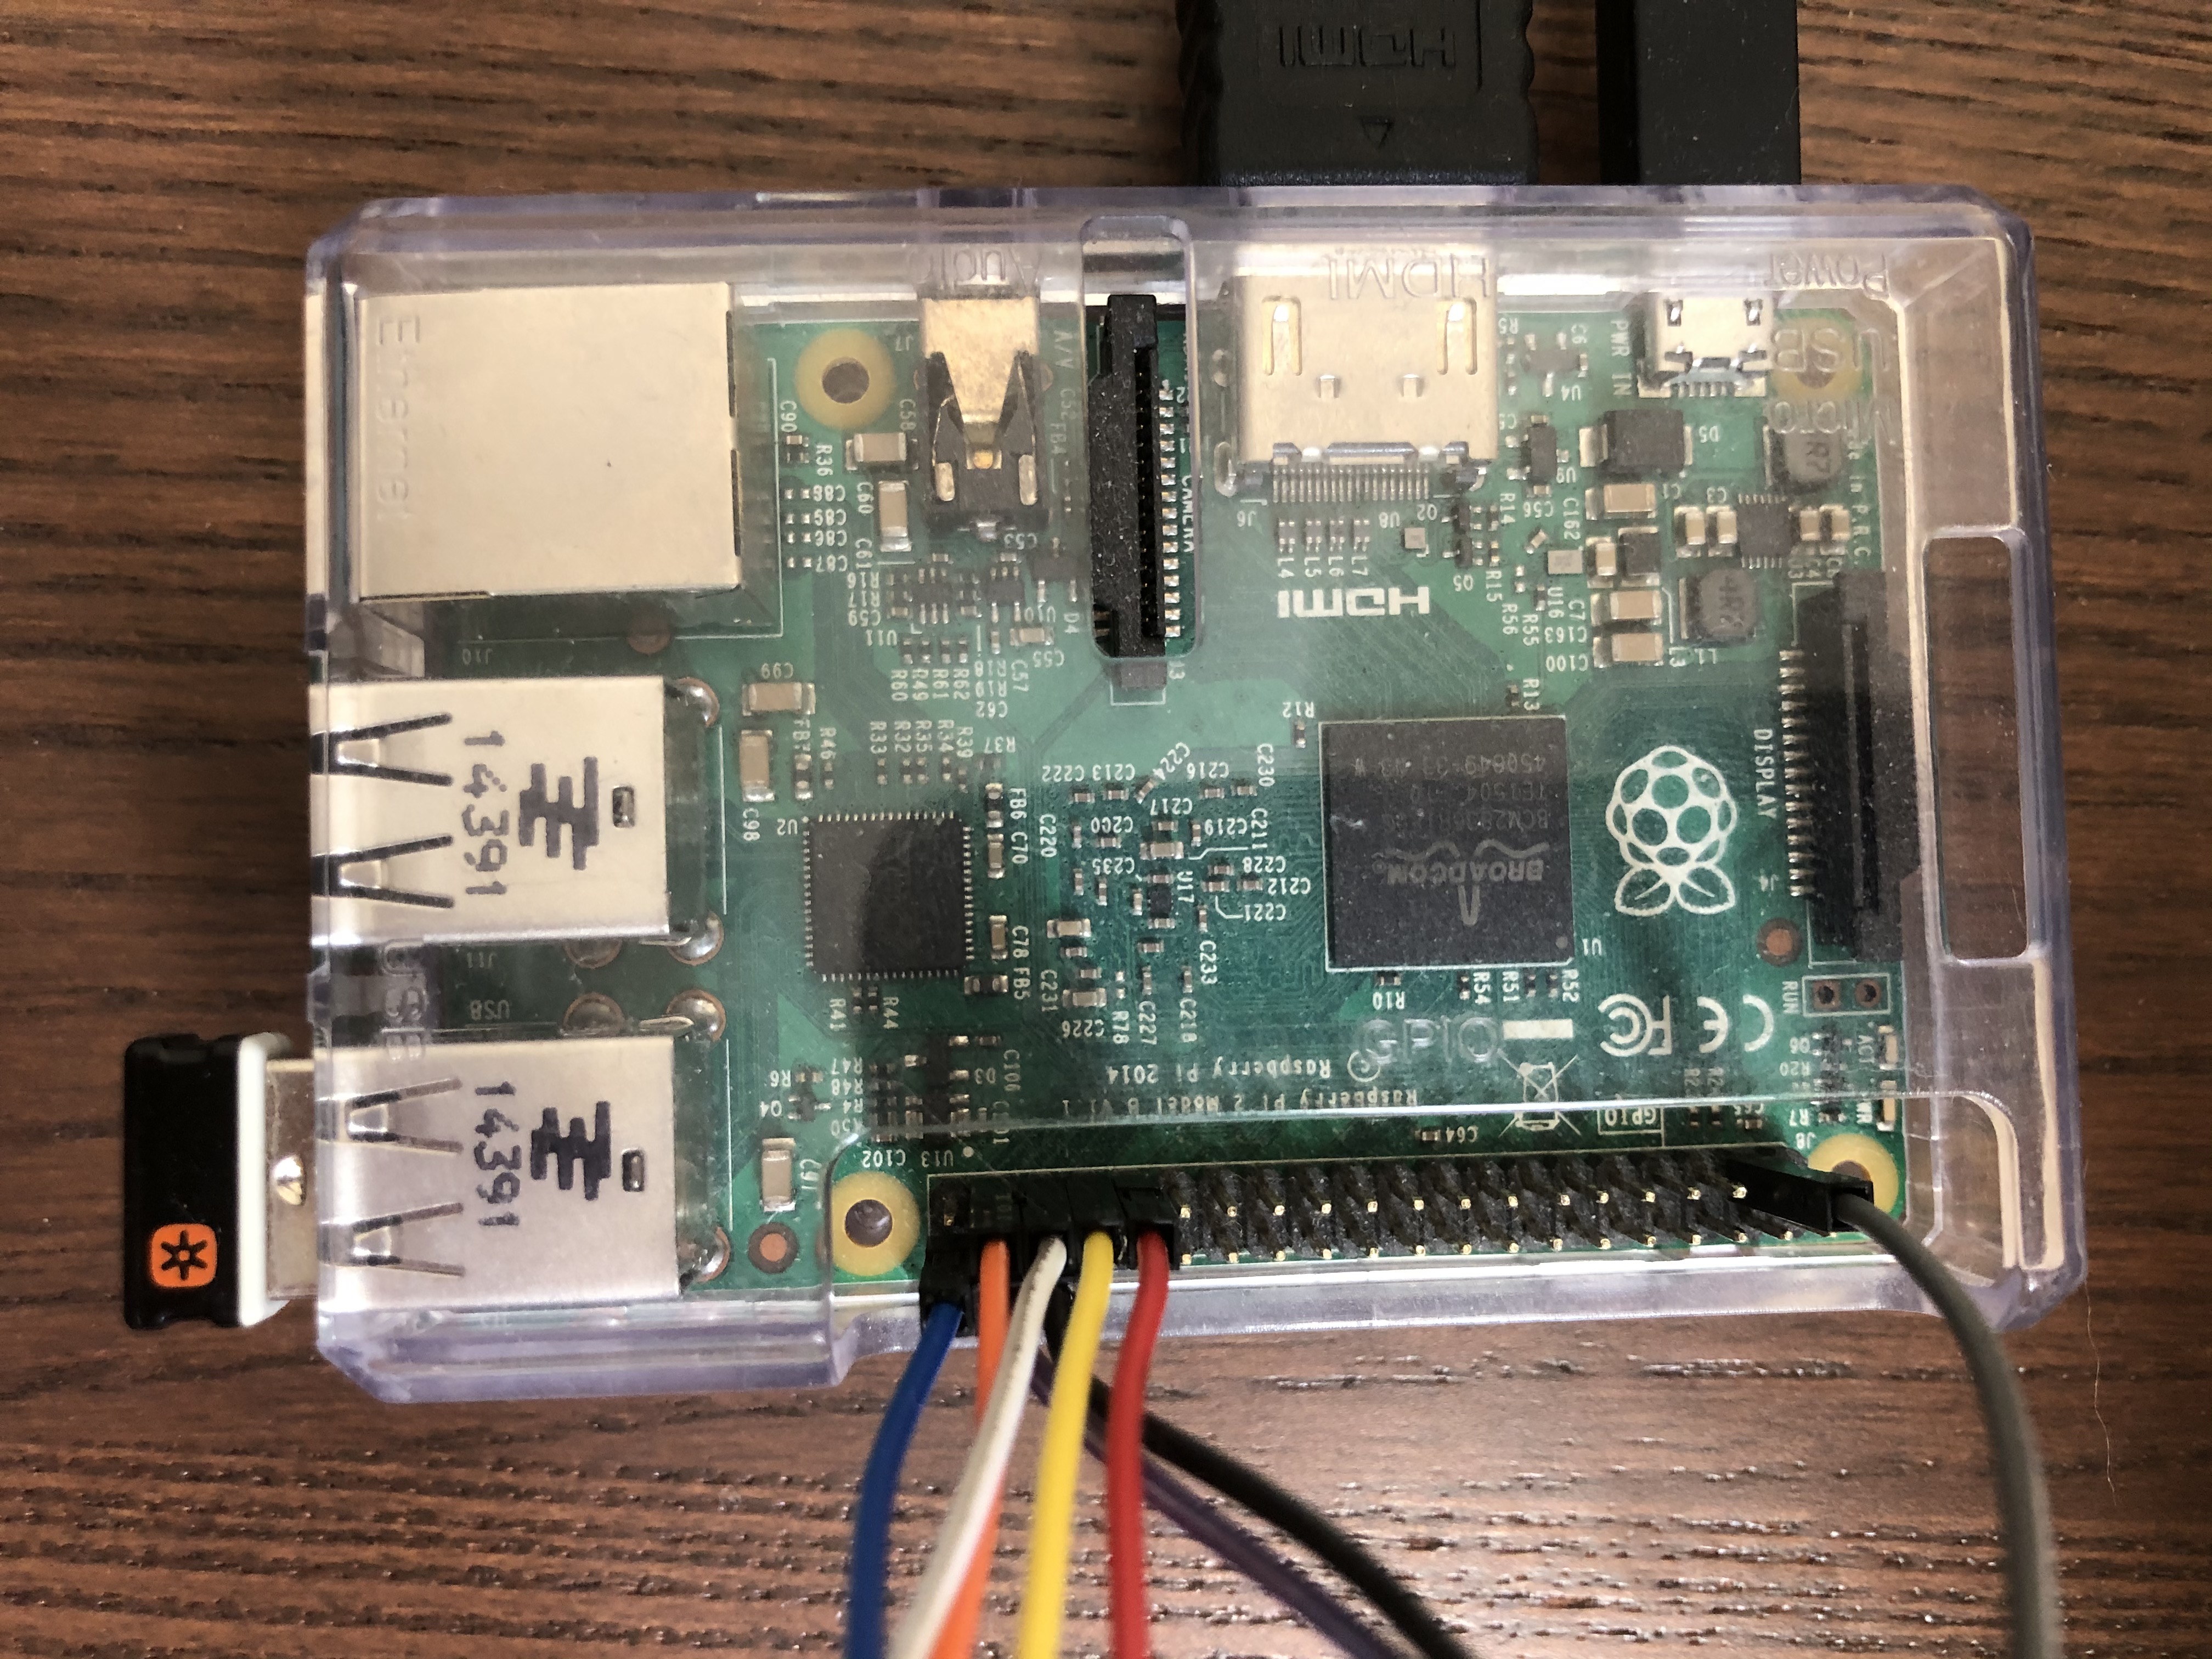
Now we can wire each segment into the Raspberry Pi.
Note: it would be a good idea to use 100 ohm resistors between the connections of the Raspberry Pi and the display, but they are not needed.
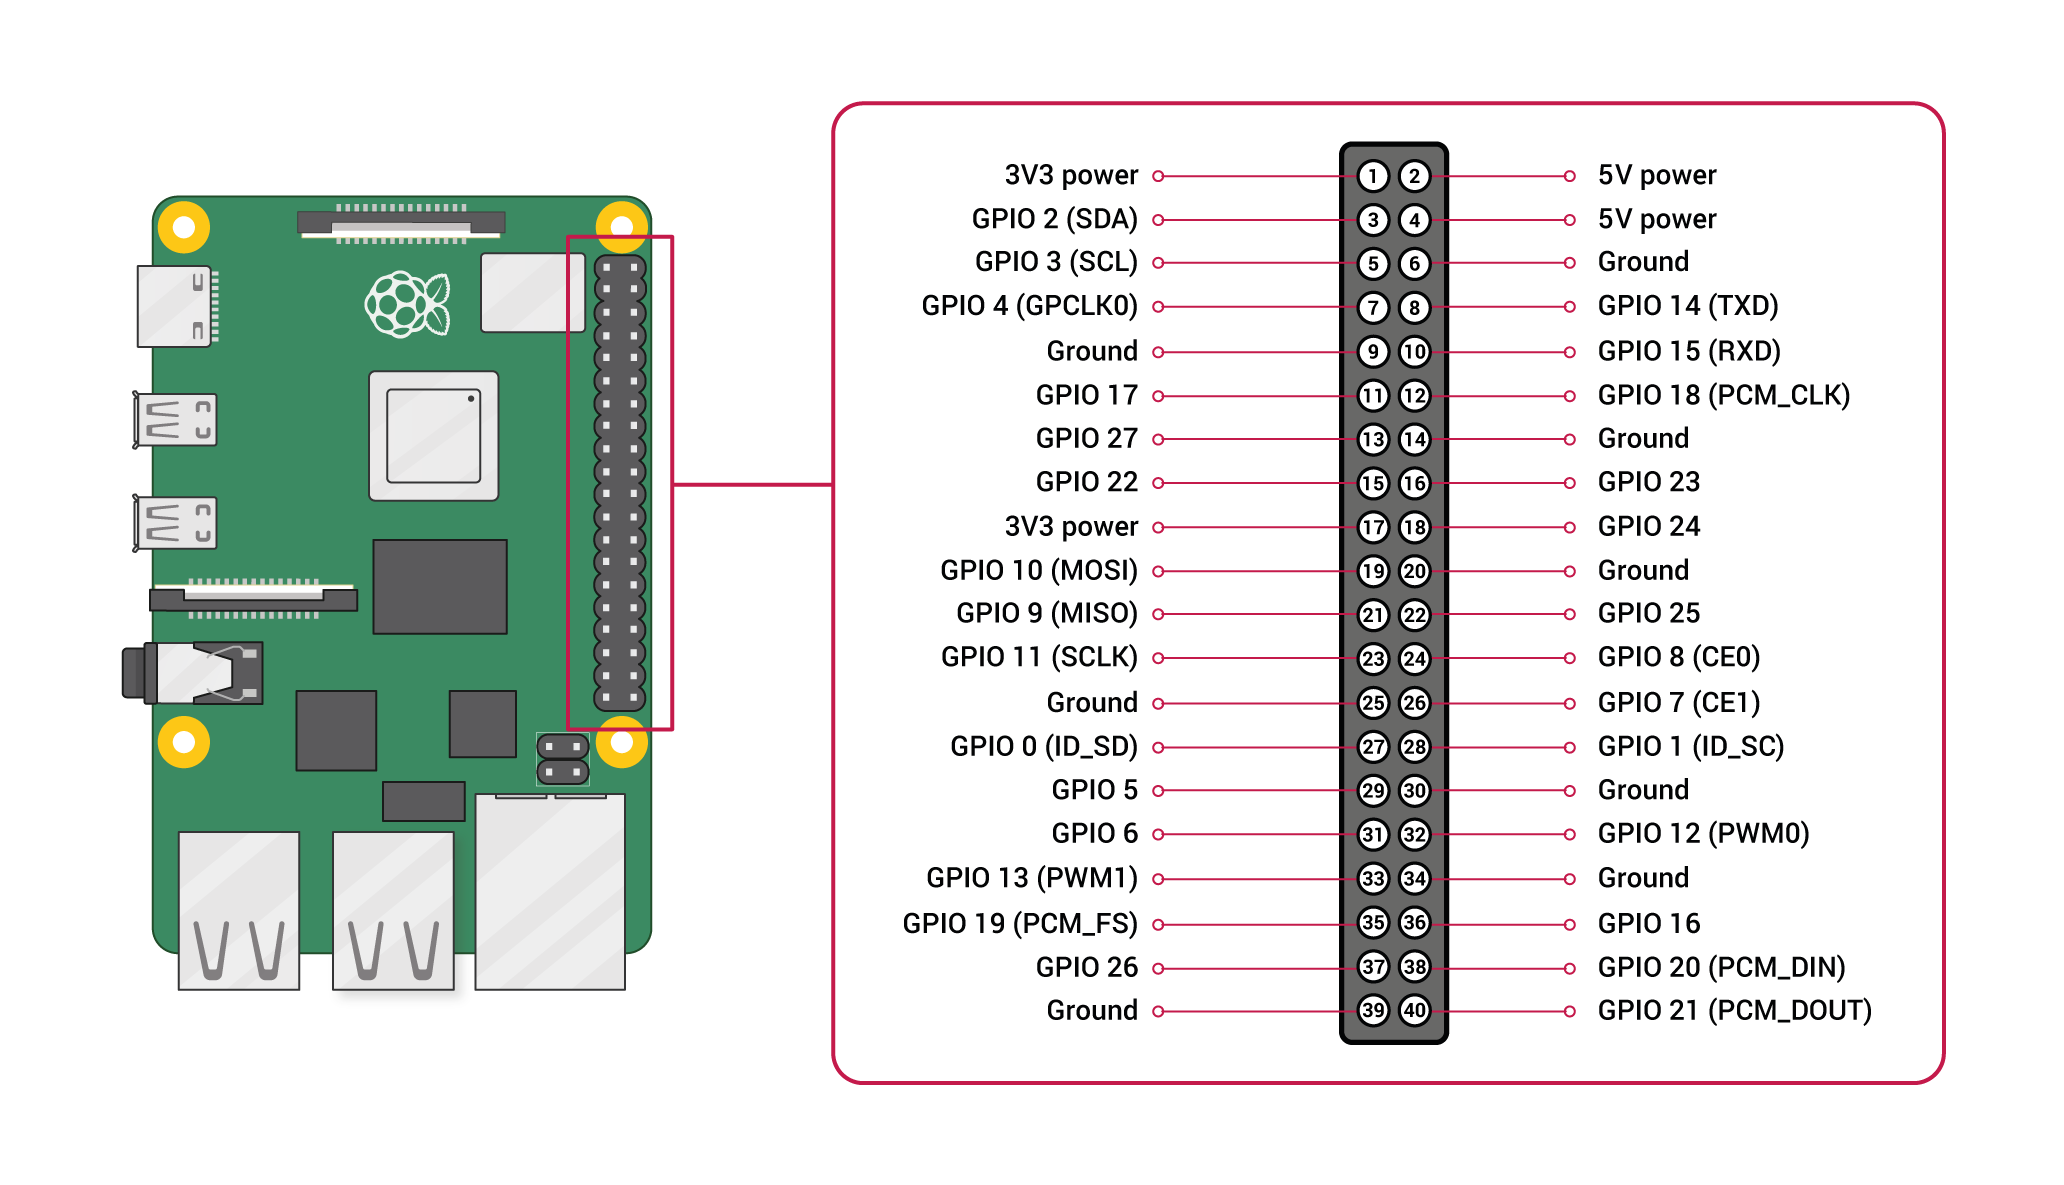
The figure above shows the pin out of the Raspberry Pi. To wire up the display, I am going to use pins 37, 35, 33, 31, 40, 38, 36, and 3. Pin 37 is connected to segment A, pin 35 to segment B, 33 to segment C, 31 to segment D, 40 to segment E, 38 to segment E, 36 to segment F, 36 to segment G, and pin 3 to common power.
We can now program the display!
Code
We re going to consider the display as a class and derive objects that allow us to work with it. The code will look like the following:
import RPi.GPIO as GPIO

class ssegment:

	def __init__(self, ap, bp, cp, dp, ep, fp, gp, pwrp):
		# Assigns pins to instace vairables
		self.a = ap
		self.b = bp
		self.c = cp
		self.d = dp
		self.e = ep
		self.f = fp
		self.g = gp
		self.pwr = pwrp

		# Sets pins to output mode
		GPIO.setmode(GPIO.BOARD)
		GPIO.setup(self.a, GPIO.OUT)
		GPIO.setup(self.b, GPIO.OUT)
		GPIO.setup(self.c, GPIO.OUT)
		GPIO.setup(self.d, GPIO.OUT)
		GPIO.setup(self.e, GPIO.OUT)
		GPIO.setup(self.f, GPIO.OUT)
		GPIO.setup(self.g, GPIO.OUT)
		GPIO.setup(self.pwr, GPIO.OUT)

		# Turns on all pins
		GPIO.output(self.a, GPIO.HIGH)
		GPIO.output(self.b, GPIO.HIGH)
		GPIO.output(self.c, GPIO.HIGH)
		GPIO.output(self.d, GPIO.HIGH)
		GPIO.output(self.e, GPIO.HIGH)
		GPIO.output(self.f, GPIO.HIGH)
		GPIO.output(self.g, GPIO.HIGH)
		GPIO.output(self.pwr, GPIO.HIGH)

	def __del__(self):
		# Turns off all pins and cleans up GPIO
		GPIO.output(self.a, GPIO.LOW)
		GPIO.output(self.b, GPIO.LOW)
		GPIO.output(self.c, GPIO.LOW)
		GPIO.output(self.d, GPIO.LOW)
		GPIO.output(self.e, GPIO.LOW)
		GPIO.output(self.f, GPIO.LOW)
		GPIO.output(self.g, GPIO.LOW)
		GPIO.output(self.pwr, GPIO.LOW)

		GPIO.cleanup()

	def display(self, n):

		# Assigns each number its coresponding segment representation
		bitmap = {
			0: 0b00111111,
			1: 0b00000110,
			2: 0b01011011,
			3: 0b01001111,
			4: 0b01100110,
			5: 0b01101101,
			6: 0b01111101,
			7: 0b00000111,
			8: 0b01111111,
			9: 0b01100111
		}

		# Assigns segments to positions
		charMap = {
			'a': 0b00000001,
			'b': 0b00000010,
			'c': 0b00000100,
			'd': 0b00001000,
			'e': 0b00010000,
			'f': 0b00100000,
			'g': 0b01000000
		}

		# Assigns pins to segments
		pinMap = {
			'a': self.a,
			'b': self.b,
			'c': self.c,
			'd': self.d,
			'e': self.e,
			'f': self.f,
			'g': self.g
		}

		value = bitmap[n]

		GPIO.output(list(pinMap.values()), GPIO.HIGH)

		for i, e in charMap.items():
			if value & e == e:
				GPIO.output(pinMap[i], GPIO.LOW)

	def reset(self):
		GPIO.output(list(self.a, self.b, self.c, self.d, self.e, self.g, self.h, self.pwr), GPIO.HIGH)
The main methods we are interested in are the display() and reset() methods. The display method allows us to display a number from 0-9 on the display and the reset method allows us to turn the display off.
To test the program out, lets create a main.py file. The contents of the file will look like the following:
from s_segment import ssegment
import RPi.GPIO as GPIO
import time


seg = ssegment(37, 35, 33, 31, 40, 38, 36, 3)


while True:
    for i in range(10):
        seg.display(i)
        time.sleep(1)
To run this program, open up a terminal in the same location as the ssegment.py and main.py files and type python main.py. This program will display the numbers 0-9 with a second in between each number, forever.