Creating A Clock With Raspberry Pi And Python
In this lesson, we are going to create a digital clock using a Raspberry Pi, Python, and a Seven Segment Display powered by a Max7219 chip. If you are unfamiliar with what a Raspberry Pi or Python, please read my previous article on both found here.
Getting Started
Items Needed
For this project, I will be using the following items:
- Raspberry Pi Model B running Raspbian
- 8 Digit 7-Segment Display
- Bread Board
- Jumper Cables
Wiring
Wiring the display will be simple since it only requires 5 pins to function. We will be using pins 2, 6, 19, 23, and 24. Pin 2 is connected to VCC, 6 to GND, 19 to DIN, 23 to CLK, and 24 to CS on the display.
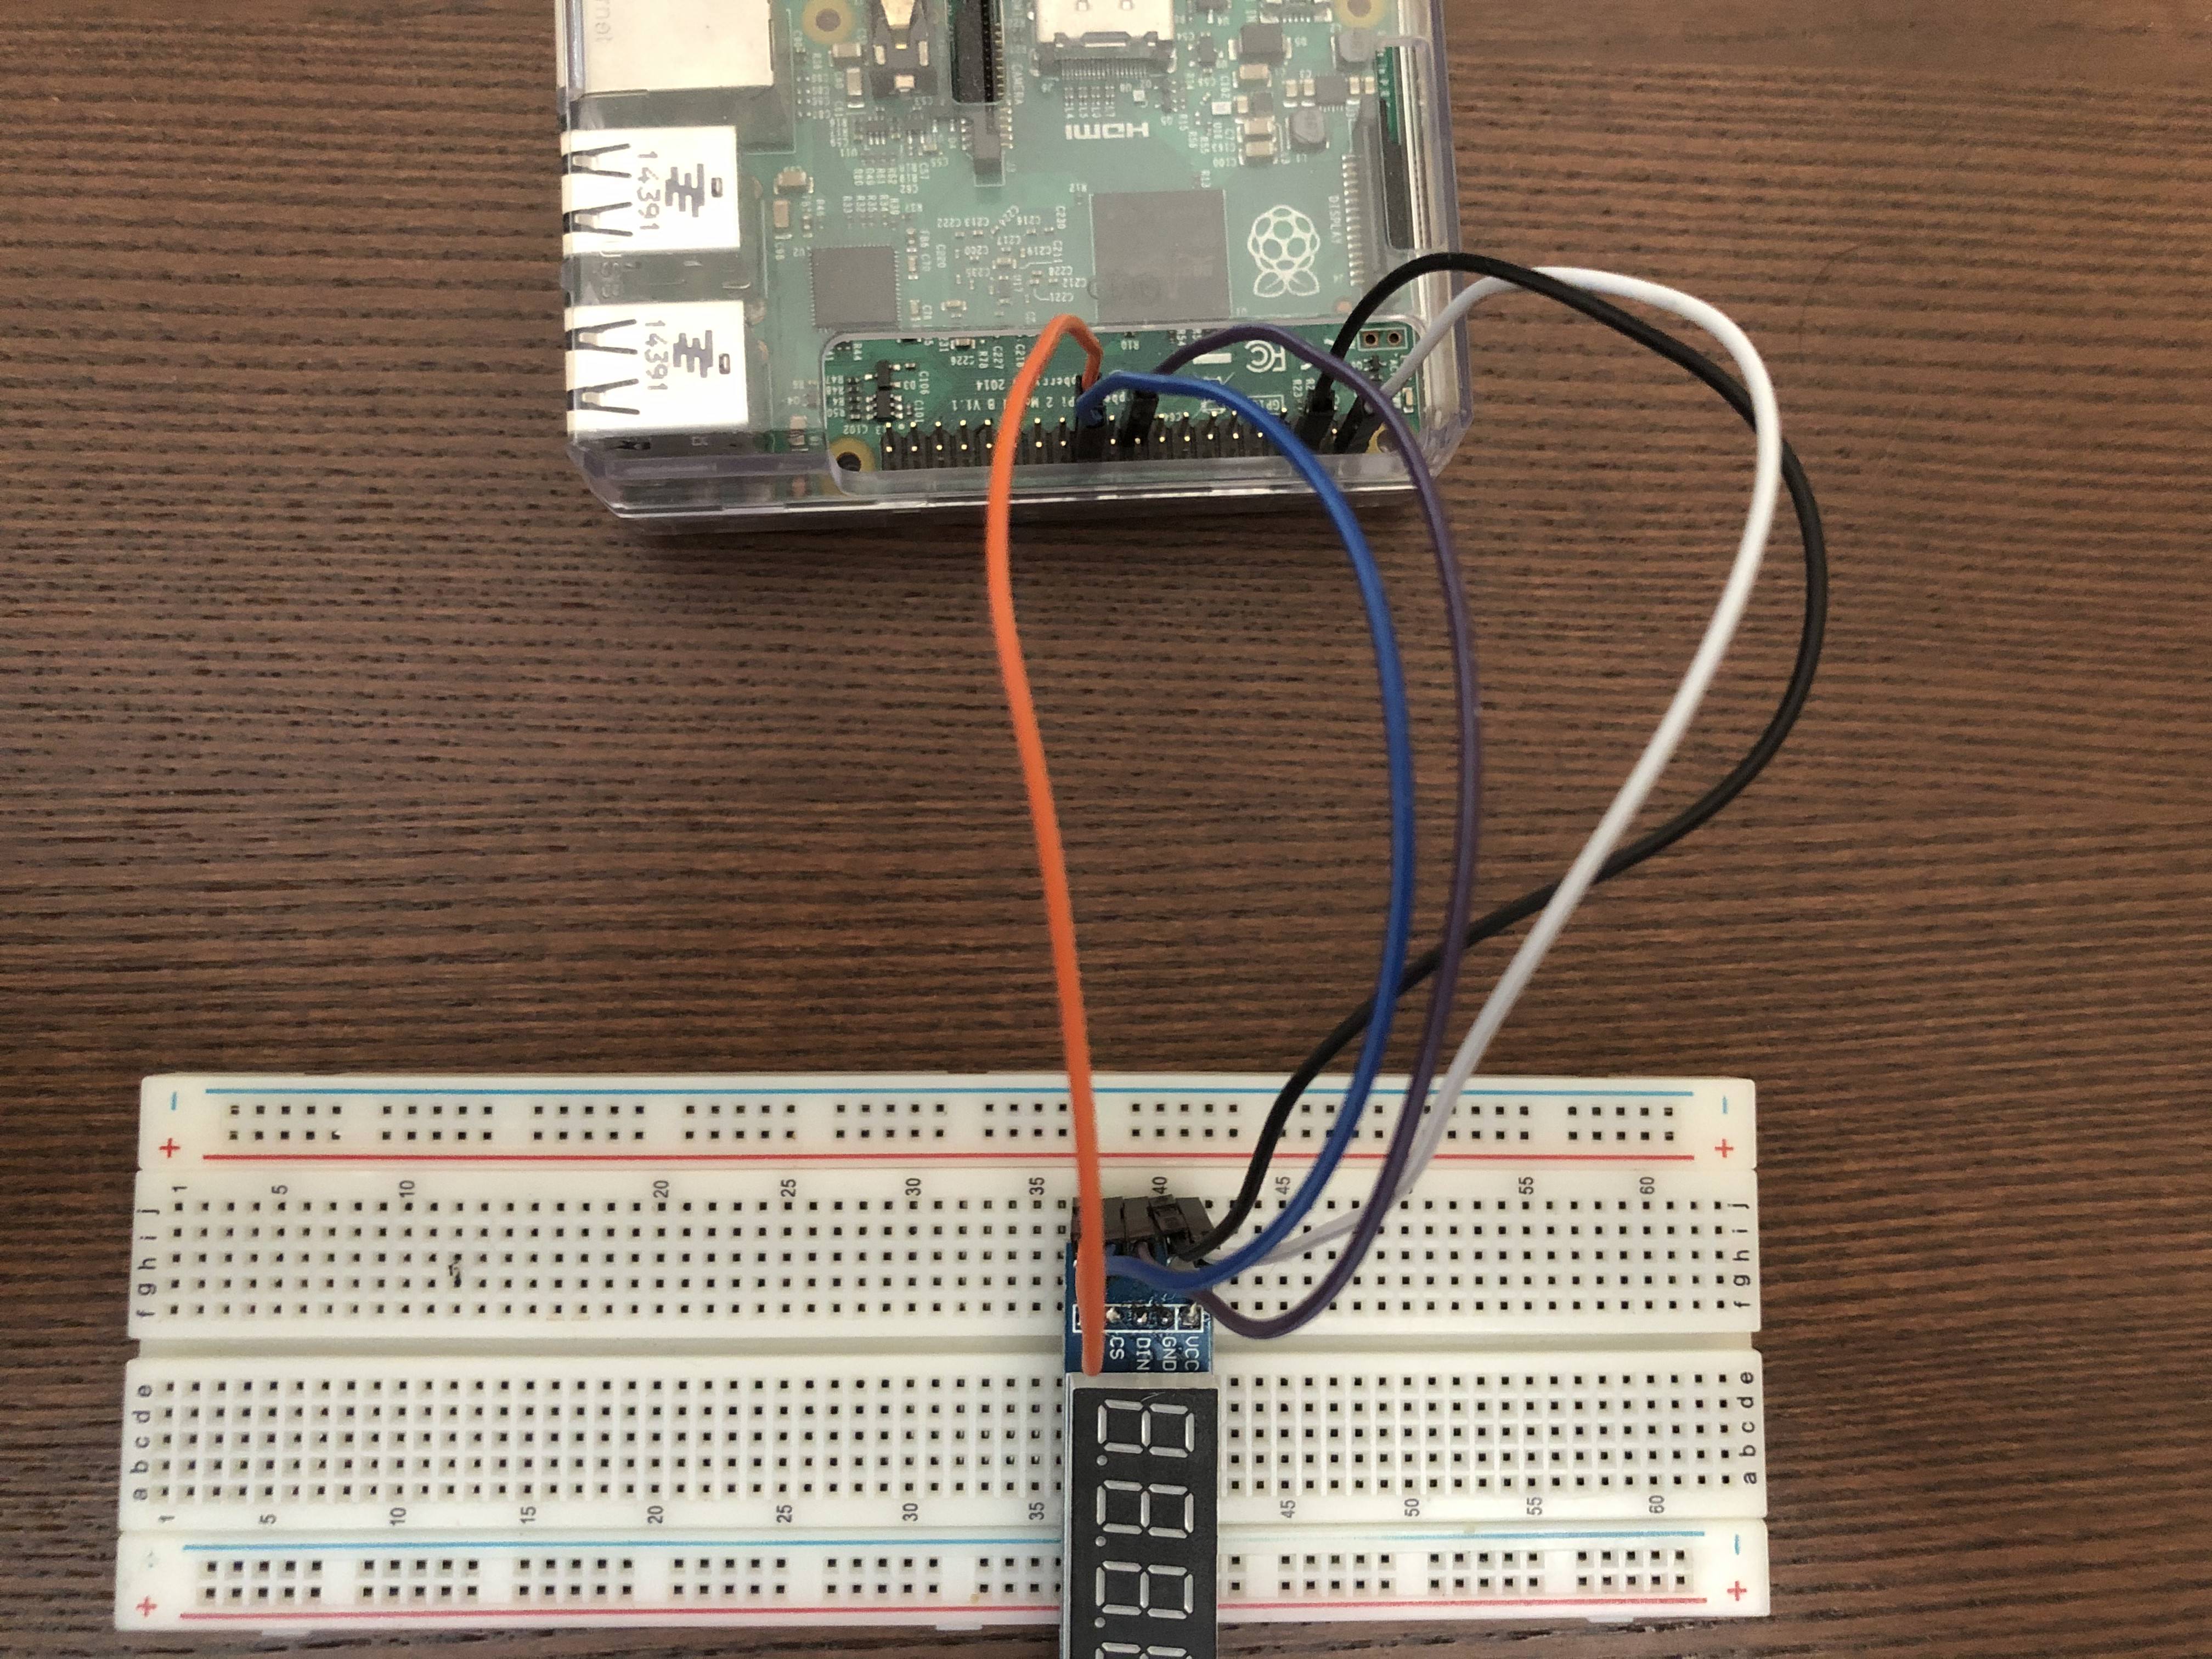
Note: Be careful when wiring the VCC and GND pins to the display. A mistake could damage your Pi.
Setting up the Pi
For the display to work, we need to setup a special pin on the Raspberry Pi which is deactivated by default. In the upper left corner, click the raspberry icon and navigate to Preferences -> Raspberry Pi Configurations. Select Raspberry Pi Configurations and a new menu will appear. At the top of the popup menu, select the Interfaces tab. Now, find the row that says SPI and select Enable and click Ok.
After setting up the SPI pin, we must now install the libraries needed to interface with the display. Open up a terminal and run the following commands:
sudo usermod -a -G spi,gpio pi

sudo apt install build-essential python3-dev python3-pip libfreetype6-dev libjpeg-dev libopenjp2-7 libtiff5

sudo -H pip3 install --upgrade --ignore-installed pip setuptools

sudo -H pip3 install --upgrade luma.led_matrix
These commands setup our Pi and allow us to use the Luma.led_matrix module. It is important to run these commands using Python3 since the module only supports versions 3.4 and greater.
Writing the code
To use the luma.led_matrix module, we must import a few libraries to initialize the display. In a main.py file, import the following:
from luma.led_matrix.device import max7219
from luma.core.interface.serial import spi, noop
from luma.core.virtual import viewport, sevensegment

import time # Needed for sleep()
from datetime import datetime # Allows us to get the current system time
Additionally, we imported the time and datetime modules that will help us create the clock. Create a function called clock that takes in a segment as its parameter:
from luma.led_matrix.device import max7219
from luma.core.interface.serial import spi, noop
from luma.core.virtual import viewport, sevensegment

import time # Needed for sleep()
from datetime import datetime # Allows us to get the current system time

def clock(seg):

    while True:
        now = datetime.now()
        seg.text = now.strftime("%H-%M-%S") # Formats the time as HH-MM-SS
        time.sleep(0.5) # Updates every 500ms
Now we can create a segment object and call the clock function on it:
from luma.led_matrix.device import max7219
from luma.core.interface.serial import spi, noop
from luma.core.virtual import viewport, sevensegment

import time # Needed for sleep()
from datetime import datetime # Allows us to get the current system time

def clock(seg):

    while True:
        now = datetime.now()
        seg.text = now.strftime("%H-%M-%S") # Formats the time as HH-MM-SS
        time.sleep(0.5) # Updates every 500ms

serial = spi(port=0, device=0, gpio=noop())
device = max7219(serial, cascaded=1)
seg = sevensegment(device)

clock(seg)
To run the program, open up a terminal in the same directory as the main.py file and type python3 main.py.